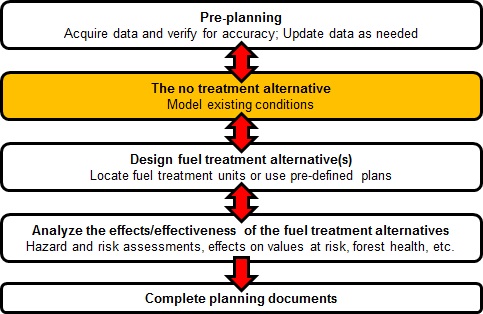

Once you have complied and updated your data the next step is to build the landscape file and model fire behavior for the no-treatment alternative. If you are not familiar with FlamMap and want to learn more about the program than shown here visit the web site and download the program and tutorials or follow the FlamMap tutorial in our Supplemental Guide. The FlamMap steps for the exercise will be outlined, but not explained in full detail.
The three steps to complete the modeling of existing conditions are:
The updated fuel model and canopy base height rasters from the Pre-planning section will be used along with the originally downloaded LANDFIRE data to build a no-treatment LCP.
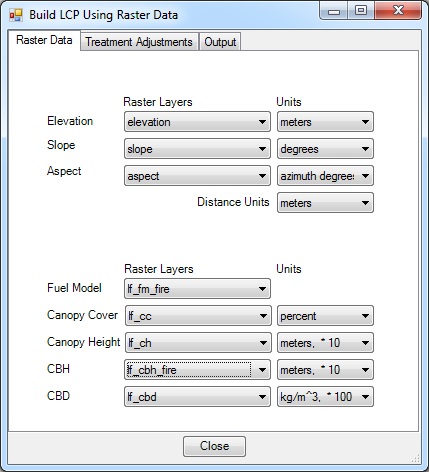
Click the Build LCP button on the ArcFuels10 toolbar, then select Build LCP Using Raster Data from the drop-down list. For details about the form please see Build LCP Using Raster Data.

Select the Raster Data tab, fill out the form following the figure below.
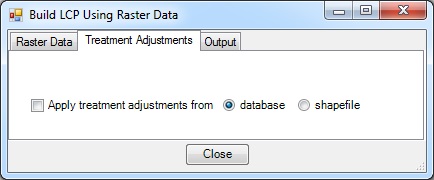
Select the Treatment Adjustments tab.
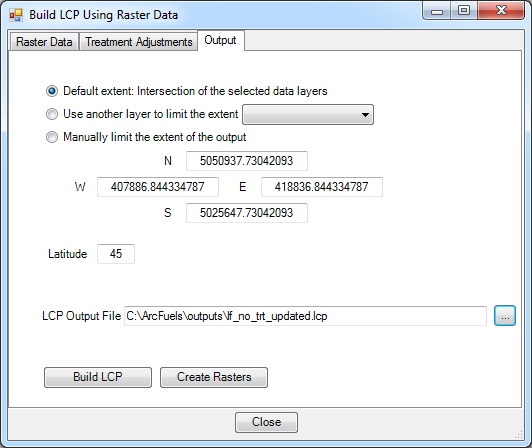
Select the Output tab, fill out the form following the figure below.
Now that the LCP has been built we will run FlamMap5 to output potential fire behavior. We will be doing this in 2 steps. The first will be to output the "basic" fire behavior outputs. These outputs are much like running NEXUS or BehavePlus for each pixel across the landscape representing a snap-shot in time. Fire is not simulated across the landscape, rather potential fire behavior is calculated for each pixel independent of the neighboring pixels. The second step will run the minimum travel time (MTT) algorithm for random ignitions to complete a wildfire risk assessment. The (MTT) feature is a two-dimensional fire growth model (Finney 2002). It calculates fire growth and behavior by searching for the set of pathways with minimum fire spread times from point, line or polygon ignition sources.
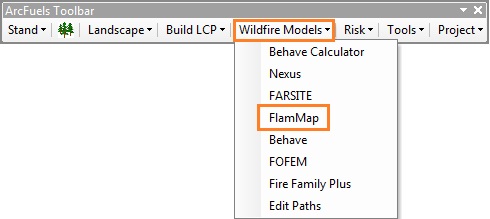
Click the Wildfire Models button on the ArcFuels10 toolbar then select FlamMap from the drop-down list to open FlamMap.
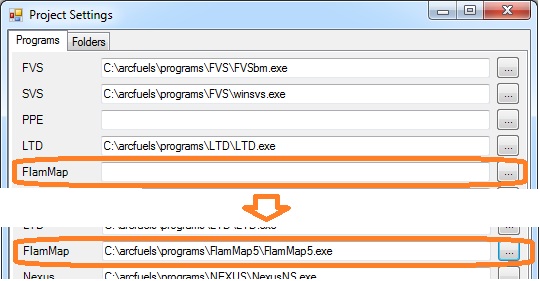
If the Project Settings form opens rather than FlamMap, the program needs to be linked. Use the navigation  button to load the path to the FlamMap5 executable file.If you have FlamMap installed on your computer you can also link to that location, or open FlamMap externally.
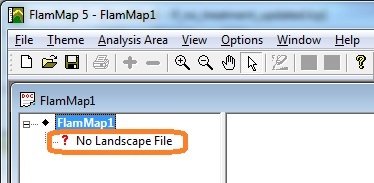
When FlamMap opens, double-click ? No Landscape File to navigate to and open lf_no_trt_updated.lcp.
The LCP will be loaded with the fuel
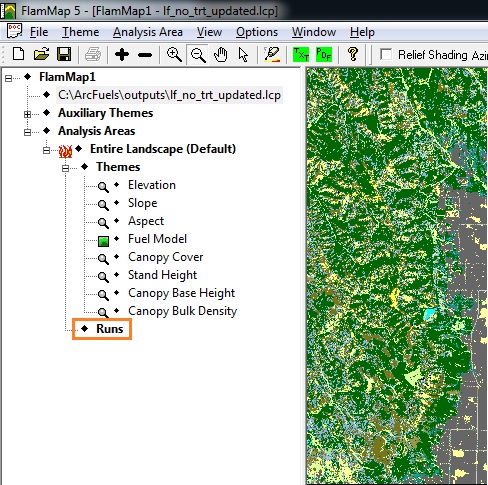
Create a new run by double-clicking on Runs (see figure above).
Fill out the Run: New Run form following the figure below.
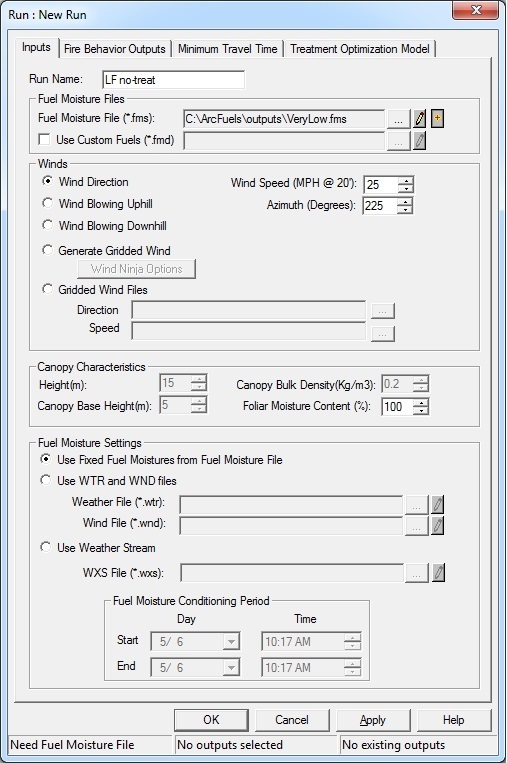
We will be creating a fuel moisture file bases on the very low scenario in Scott and Burgan 2005.
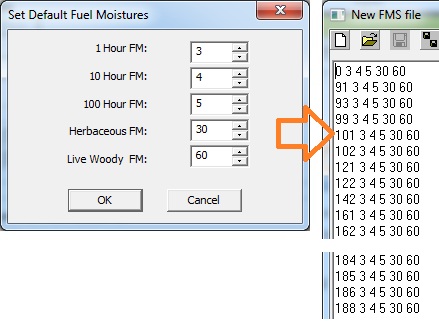
 button to save the FMS as "VeryLow" in the outputs folder of the ArcFuels directory. Then close the window.
Select the Fire Behavior Outputs tab, fill out the form following the figure below.
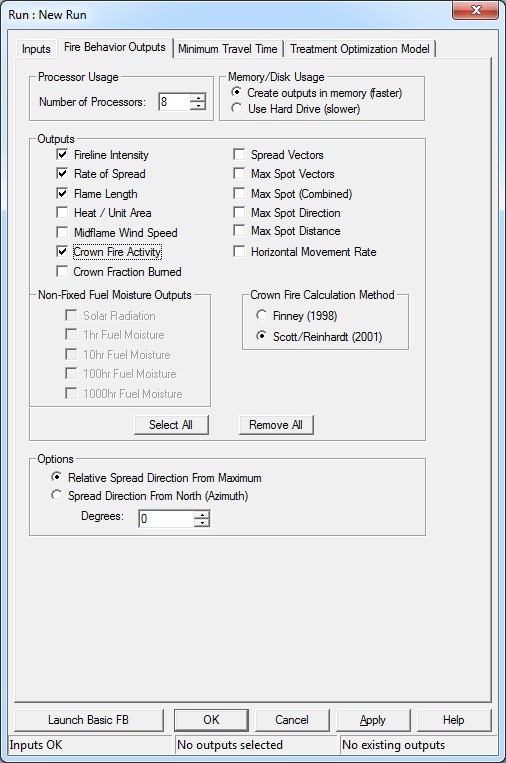
The number of processors may be different than displayed in the figure. That is fine, allow FlamMap to use all of the processors available.
Return to FlamMap.
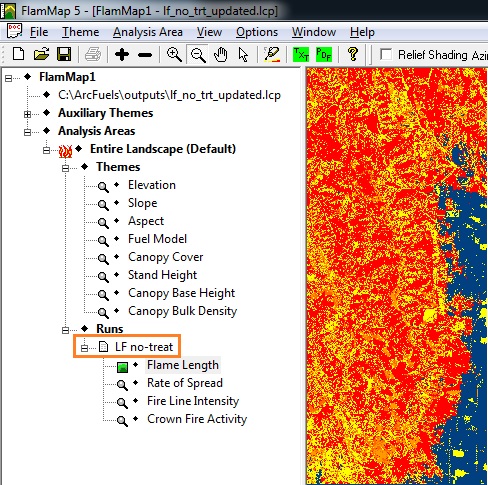
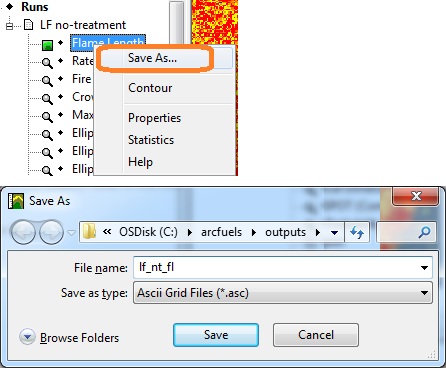
Next we will run FlamMap for random ignitions to create outputs to complete a wildfire risk assessment. This run can take 30 minutes or longer to complete depending on your computers capacity. We are running this as a separate run because we will need to increase the resolution of the output data to save computation time. Had we done this as a single step, the basic fire behavior outputs would have also been calculated and output at the coarser resolution.
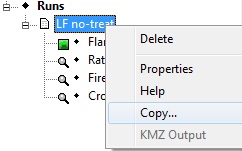
Copy the run just completed to load all the input data.
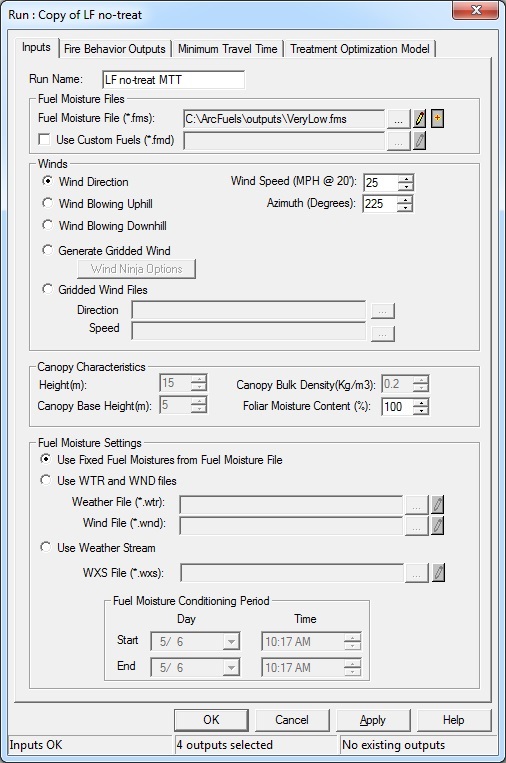
Select the Fire Behavior Outputs tab, fill out the form following the figure below.
Select the Fire Behavior Outputs tab, click the Remove All button to clear the outputs.
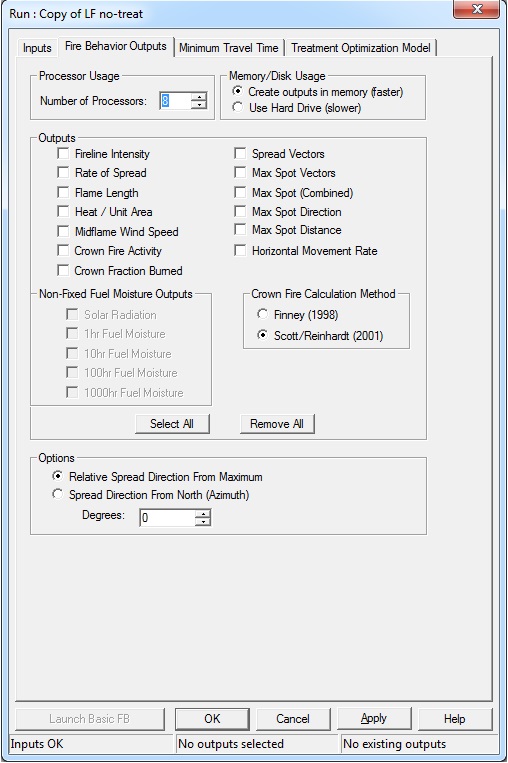
.
Select the Minimum Travel Time tab, fill out the form following the figure below.
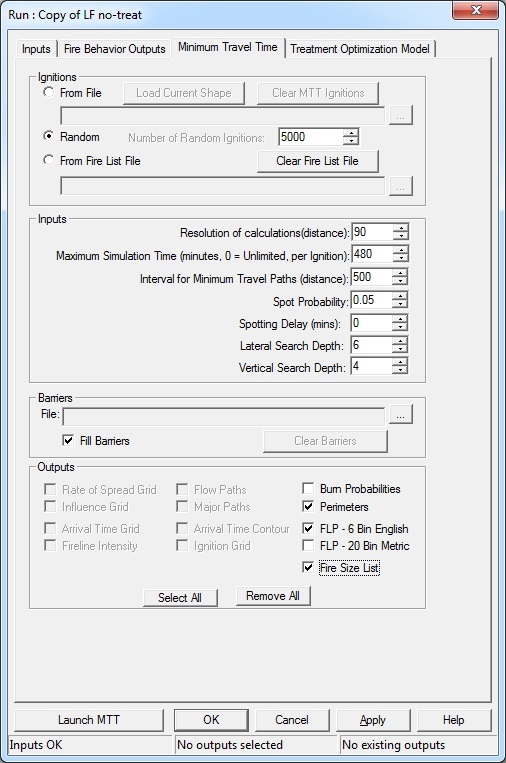
Return to FlamMap.
Save the FlamMap run as "LF no-treatment" in the outputs folder in the ArcFuels directory.
Close FlamMap.
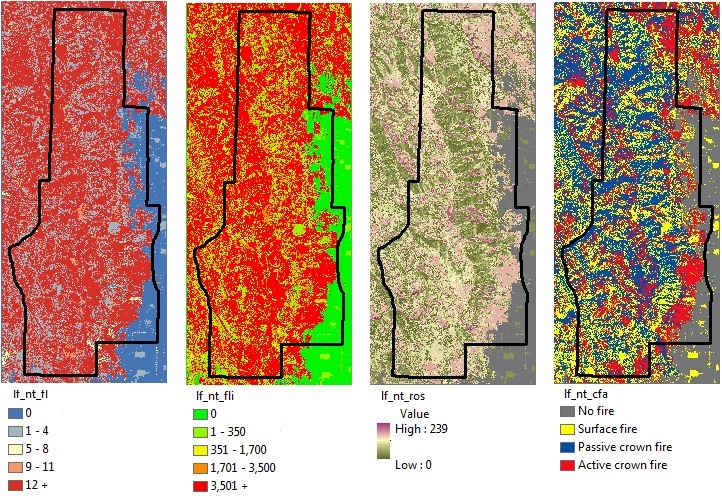
We will convert all of the FlamMap modeled outputs using the ArcFuels Tools: Convert ASCII to Raster, Risk: Convert FLPs, and Risk: Convert Fire Size List forms and also define the projection for the perimeter shapefile in ArcMap.
Before any of the ASCII files can be used in ArcMap, they must be converted to rasters. We will be converting the files in two steps. The first will convert the flame length, fireline intensity, and rate of spread rasters as floating point files. The second will convert the crown fire activity raster as an integer.
Click the Tools button on the ArcFuels10 toolbar then select Batch Convert ASCII to Raster from the drop-down list.

Fill out the Batch Convert ASCII to Raster form following the figure below.
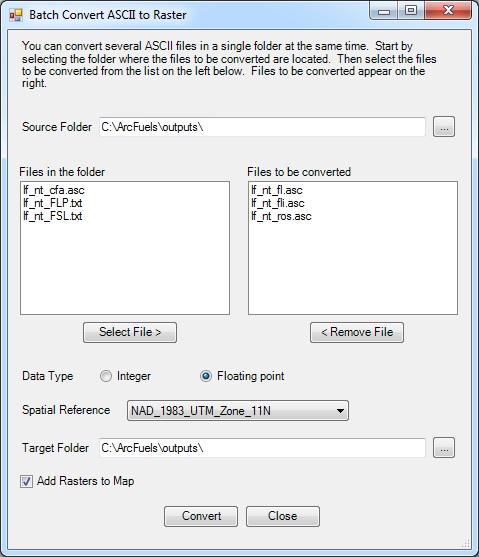
With the Batch Convert ASCII to Raster form still open, fill out the form following the figure below.
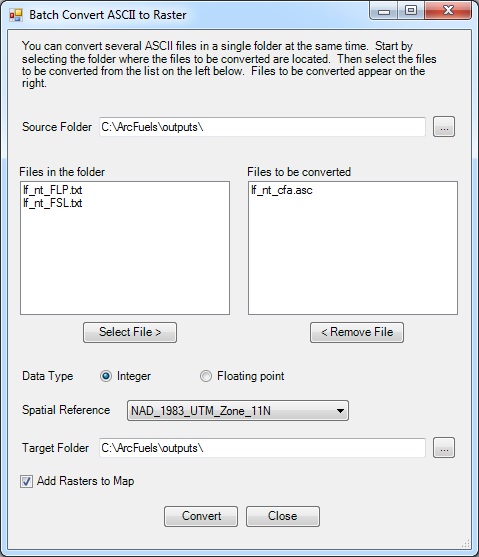
Return to ArcMap
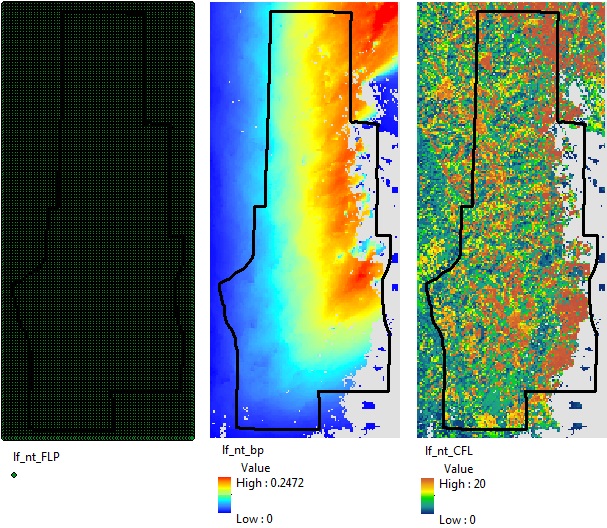
For more information about what a FLP file is see Wildfire Risk and Risk: Convert FLPs.Convert the FLP text file to a FLP point shapefile, BP raster and CFL raster. We are not converting the FIL rasters because we will be using the FLP point shapefile to do our risk calculations during the Analyze the effects/effectiveness of the treatment alternatives step.
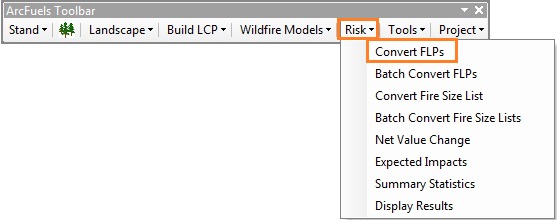
Click the Risk button on the ArcFuels10 toolbar, then select Convert FLPs from the drop-down list.
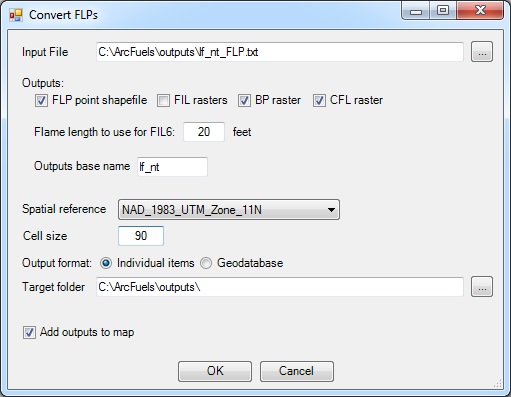
Fill out the Convert FLPs form following the figure below.
Return to ArcMap.
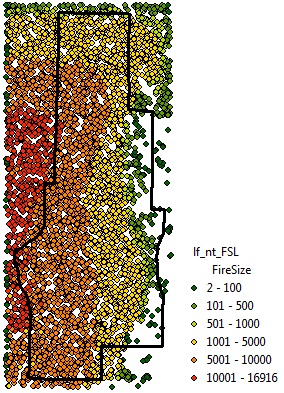
For more information about the fire size list file see Wildfire Risk and Risk: Convert Fire Size List. Convert the FSL text file to a shapefile. In addition to using the shapefile to summarize wildfire exposure, the text file can be used to simulate the same ignitions in future FlamMap runs. We will be doing this in the Designing fuel treatment alternatives section of this tutorial.
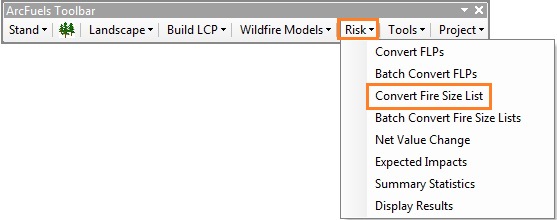
Click the Risk button on the ArcFuels10 toolbar, then select Convert Fire Size List from the drop-down list.
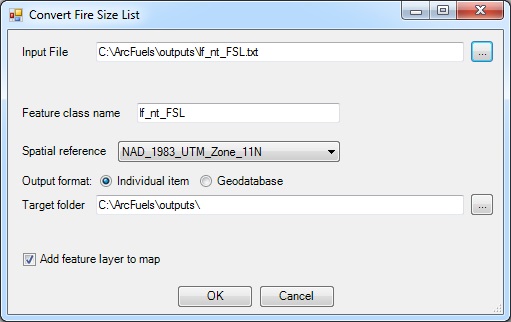
Fill out the Convert Fire Size List form following the figure below.
Return to ArcMap.
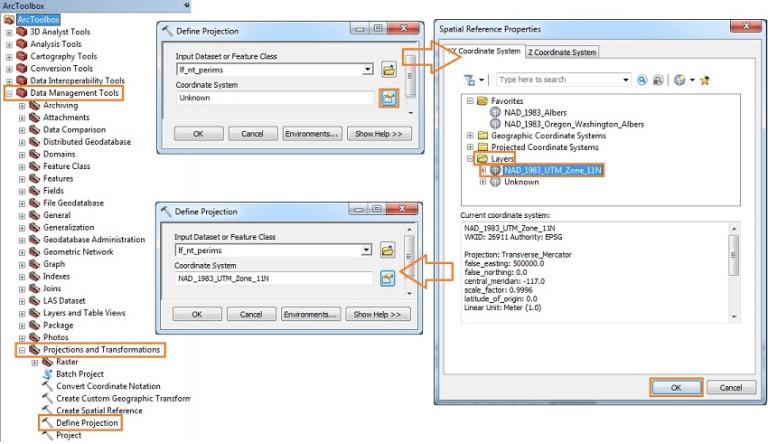
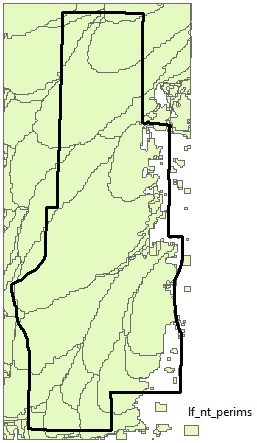
The last step for post-processing the FlamMap outputs is to define the projection of the perimeter shapefile. There are no tools for doing this in ArcFuels, so the ArcMap ArcToolbox will be used.
Click the Add Data 
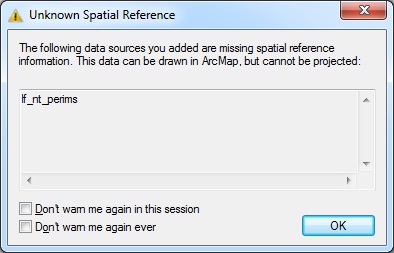
In ArcToolbox open the Define Projection tool and define the projection to match that of the other Mt. Emily data layers.
To continue to the next section go to Designing fuel treatment alternatives.